Wednesday, December 30, 2009

A Girl And Her Shoes


I had to grab my camera and snap a picture of little miss Ivy and her selection of shoes- with footed sleeper. This girl does love her shoes. We find her putting on everyone's shoes, heels, sister's boots, daddy's big boat tennis shoes and more. On this day her shoes of choice were one polka dot Mary Jane(her own shoe) and one purple Croc(her sister's shoe). Only Ivy can pull this off in a pair of footed pajamas! You never know what she's going to pair up next. Later she added a polka dot hat to this ensemble. It kinda had that Punky Brewster feel to it. Guess that, along with her spunky attitude, is why we sometimes refer to her as our little Punky Brewster.


Tuesday, December 29, 2009

Christmas Morning


On Christmas morning the kids were up bright and early, of course, to check out their stockings filled with surprises from Santa. Will and I could hear them in our room talking about all their goodies in excitement. I love that!


Laci opening one of her gifts which was a new little jewelry box and a heart necklace.


Ivy with her Cootie game. Who knew she would like it so much! She always wants to play games with us, but we just don't have many for her age. So now she has her very own game.


Trent is opening his Bop It! game. I have to say this game is addicting. He already made a high score of 100!


Laci is putting on her new knee socks which were tucked into one of her gifts. She wanted knee socks soooo bad, so when I found them at Target I had to get them. I kid you not, she screamed when she saw these! Big hit!

As always, we had a great Christmas morning and enjoyed spending it with our family and seeing the smiles on their faces.

Thursday, December 24, 2009

Merry Christmas To All


I want to wish all of you a very Merry Christmas. One that is filled with family, love and laughter. I am so thankful for the reason we have this holiday, which is Christ the Savior. Let us remember Him at Christmas and throughout the year.


I also wanted to share a few of our Christmas decorations. It's definitely a few since I didn't get pictures taken of everything. Above is my grapevine tree that I've had for years and even with it's slight lean that I have to make straight propped up with a pen top, I still love it. It sits with a NOEL sign I found at Target and my little grouping of fabric snowmen. On the mantel, our stockings are hung with care (thanks to Command Adhesive hooks, gotta love those). The stockings are still my favorite. I got them a couple years ago at Kirkland's and had them embroidered.


Last, but certainly not least are these adorable vintage tags Tammy sent me for Christmas. She made them and they look great.That crafty girl! I just set them on my two black shelves paired with a candle tied with ribbon. I love these! The vintage Christmas scenes on them are so pretty.


On a different note, are you looking for a last minute gift idea or a quick treat to give. Try this Double Fudge Brownie Mix. Just layer the ingredients in a container or bag and attach the directions to make them. Quick, simple and yummy! I love to give mixes for gifts. After all, most people like to eat. I put my mix in a container then printed off the directions and taped it to the top. I topped it off with curling ribbon and a tag.


Double Fudge Brownie Mix
1 1/2 c. sugar
1/2 c. chopped pecans
3/4 c. chocolate chips 3/4 c. cocoa powder
3/4 c. all purpose flour

Layer ingredients in a resealable bag or container.

Double Fudge Brownies
1 container Double Fudge Brownie Mix
3/4 c. butter or margarine, softened
3 eggs, slightly beaten

Preheat oven to 325. In a large bowl, cream the butter and eggs. Add Double Fudge Brownie Mix and stir until the mixture is well blended. Spread batter into a lightly greased or sprayed 9x12 pan. Bake 30-40 minutes. Cool in pan. Cut into squares.

Wednesday, December 23, 2009

Muddy Buddies

A few weeks ago Trent asked if he could make Muddy Buddies because he remembered tasting them and thought they were sooo good. So on Monday he got to make his Muddy Buddies. In all of my cooking and treat making, I had never made these. I know. I can't believe I've never tried my hand at them. I didn't really this time either. Trent did just about everything. They're kinda messy, you know that "muddy" part, but it's a fun snack for kids to make.


Pouring in the chocolate chips.


He measured and poured in the peanut butter.


Time to get muddy!


Trent had some help from little sister. They shook and shook the cereal all around to coat it with powdered sugar. Yum!


Trent's finished product. Good thing all of us like them. We'll be munching on these babies for a while. The recipe makes a big ole bowl full. Good job Trent!

Chex Muddy Buddies
9 cups chex cereal(any kind or a combination)
1 cup semisweet chocolate chips
1/2 c. peanut butter
1/4 c. butter or margarine
1 tsp. vanilla
1 1/2 c. powdered sugar

1. Into a large bowl, measure the cereal; set aside.
2. In a microwavable bowl, microwave chocolate chips, peanut butter and butter uncovered on high 1 minute; stir. Microwave about 30 seconds longer or until mixture can be stirred smooth. Stir in vanilla. Pour mixture over cereal, stirring until evenly coated. Pour into a 2- gallon resealable food-storage plastic bag.
3. Add powdered sugar. Seal bag; shake until well coated. Spread on waxed paper to cool. Store in airtight container in refrigerator.
Makes 18 servings (1/2 c. each)

Tuesday, December 22, 2009


Last Thursday Laci's first grade class had their Christmas breakfast and thanks to my trusty babysitter I got to be there. The kids had fun and enjoyed some really yummy food.

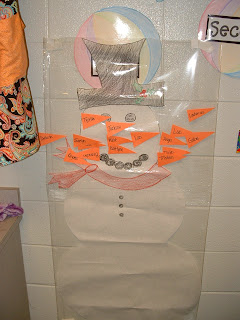
Here, Laci is with her teacher, Miss Heaton, in front of their cute classroom tree.


The class played a fun game to swap books with each other. Laci is showing off her Tinkerbell book she got. It was so funny. When she opened this book, which was from a little boy named Jackson, she gave him a huge hug. Whether he wanted it or not, he got a hug.


Miss Heaton made each of her students one of these cute cans with their initial and red polka dots. It was filled with Christmas goodies and a book, which was so sweet of her. I've made a similar craft, so I know this was time consuming. I appreciate the time she took to make something for them.


They also played pin the nose on Frosty. They were so funny playing this. First, second and third place got to take home a book.

I'm glad I got to go and help out and have fun with Laci and her little friends.She had a blast!

Wednesday, December 16, 2009

A Favorite Christmas Treat


One of family's Christmas traditions is to make treats to deliver to friends and neighbors. A favorite of ours to give is peanut butter balls. Oh my-- they are so good! I've shared a peanut butter ball recipe before that is very good(you can find that in my RECIPES section), but I decided to go with another recipe that we really like. This one has coconut and pecans in it. De-lish! It comes from my Southern Living Cookbook. Love that cook book. Lots of great recipes. I'm glad I received it as a Christmas present one year from a great friend. Laci and I also made snickerdoodles to go along with the peanut butter balls. She's always a great helper in the kitchen.

We packaged up our treats in cute Christmas containers and sacks and then headed off to deliver them Monday night for our family home evening activity. We did have to trek out into the rain, but it was worth it. It's fun to give a small token of friendship, especially one you can eat!


Peanut Butter Chocolate Balls
1 1/2 c. graham cracker crumbs
1 1/2 c. flaked coconut
1 1/2 c. chopped peanuts or pecans
1 c. butter or margarine, melted
1 (16 oz.) pkg. powdered sugar
1 (12 oz.) jar crunchy or creamy peanut butter
1 tsp. vanilla
2 (12 oz. packages semisweet chocolate morsels(I used a pkg. of chocolate candy coating)
3 tablespoons shortening

Combine first 7 ingredients, stirring well. Shape mixture into 1-inch balls.
Combine chocolate morsels and shortening in top of a double boiler; bring water to a boil. Reduce heat to low; cook until chocolate melts. Dip each peanut butter ball into chocolate mixture. Place on wax paper to cool. Store in refrigerator. Yield: about 9 dozen

Monday, December 14, 2009

All I Want For Christmas Is...... One Bottom Tooth


Our little Laci has been anticipating losing her first tooth for a while now. So, last week when she saw that one of her bottom teeth was loose and wiggly she was super excited. She wiggled that little baby for a few days and then she was ready for it to come out. Laci tried to pull it out herself and then came to me and asked if I could do it, but I chickened out. I just couldn't pull her tooth. Bring on daddy! I told her to ask her dad if he would do it and he was happy to help out. I think they actually wiggled it out together. Success! Her first tooth gone. She put her tooth under her pillow that night and couldn't wait for the tooth fairy to come.( First, the tooth fairy had to run to the ATM for some cash, since she hardly every keeps any on hand you know) Laci was so happy to find her tooth gone and a crisp $1 bill under her pillow. She is proud to show off her little gap. Wow! She's already losing teeth. It seems like yesterday when she was getting all of her teeth.

( You can see it better if you click on the picture for a larger view)

Friday, December 11, 2009

Cute & Quick Gift Ideas


Today I want to share some cute & quick gift ideas with you. If your a frequent visitor to my blog, you might remember these from some of last year's posts. Yes, they are from last Christmas, but hey, they're still cute & quick this year.

First up is a Christmas pot holder and glove with a bag of sugar cookie mix tucked inside. I rounded it out with a ribbon and attached a cookie cutter. Last year I gave these to a few friends of mine. If you're looking for some cute Christmas pot holders, ROSS is you're store. They have some cute sets that are not expensive.


Next up is a Christmas favorite of mine, Snowman Soup. We have made these at our house for years. Teachers, friends, co-workers have all received Snowman Soup.

It's quite simple. Just fill a mug with a couple packs of hot chocolate,(Land O' Lakes french vanilla is my absolute favorite)a few Hershey's kisses, a candy cane and if you want a chocolate covered spoon. Wrap the mug up in cellophane and tie on the tag with some cute ribbon.


The tag reads:
Was told you've been real good this year.
Always glad to hear it.
With freezing weather drawing near
you'll need to warm the spirit.
So here's a little Snowman Soup
complete with stirring stick.
Add hot water, sip it slow
it's sure to do the trick.


Last is a nice cake stand you can make out of a bowl and plate. I love this gift. That could have to do with my slight obsession with cake stands. I know. Weird. But I just love 'em to show off all those treats. Oh, I got a really cute red, scalloped edge one at Target a few weeks ago. Happy! --Just thought I'd share that--Back to this one. All you need to do is pick out a coordinating bowl and plate. These came from Wal-Mart. From the Better Homes & Gardens collection. Then sand the bottom of the bowl slightly. Turn your plate over to the back, glue a bead of E-6000 glue on the back side of the bowl and attach the bowl to the back side of the plate. Let dry. You should do this in a well ventilated area or outside because E-6000 is some potent glue. I chose this cream color so I could easily swap out different ribbons for different occasions. Cute, quick and different gift. Try it!

Thursday, December 10, 2009

Spreading Some Christmas Cheer


Every year The Little Music Studio, where Laci takes piano, visits a local health and rehabilitation center to spread a little Christmas cheer by playing different Christmas music. All of Mrs. Little's students weren't able to attend, but those who did performed very well. We heard renditions of everything from Jingle Bells to God Rest Ye Merry Gentlemen.

This was Laci's first time to play for an audience so she was a bit nervous on the way there, but I guess she got over that pretty quickly. She was the first one to play. Her piece was Jolly Old Saint Nicholas and she played it perfectly! I know. I just sound like a proud mama and I am , but she really did play it just right, hitting all her notes and counting great! All that practice really does pay off.Especially since Mrs. Little said she skipped Laci about 5 lessons so she could play that song. Great job Laci bug!


Of course, I didn't get any pictures of her at the piano like I should have, but here's one of them doing a sing along with the residents there. They seemed to enjoying hearing the music and I even saw some of them singing and humming along to the music. I think it brought a little more happiness to their day and hopefully got them in a Christmasy kind of mood.

Monday, December 7, 2009

ROLL TIDE!!


I have to start off my week of blogging with a big ROLL TIDE!! And did they ever roll over Tebow and the gators. Loved that game! Trent, Laci and I went up to watch it with my parents and my sister's family. We have a good time watching the games together when we can. This one was all Bama. Way to stomp that gator chomp!! On to Pasadena for the National Championship!

Tuesday, December 1, 2009

O' Christmas Tree


Last night our town held their annual Christmas tree lighting, so we all bundled up and went down town to take part in the festivities. Their was cake, punch, cookies and performances by a local church. Very festive! I love our little town, especially around Christmas. They hold activities like this one and a Christmas On The Coosa event and a live nativity later on in the month. Everyone comes out and joins in the fun and walks around town to enjoy. It's great. Kind of has that Steel Magnolias feel to it.

The picture above is the town's tree that is in Gold Star Park that was lit last night.


We stood in line to let Ivy set in Santa's lap. She was so excited when she was in line. I don't think she was too sure about it when she actually got in his lap. Her face says it all. She didn't cry, but she wouldn't look at him at all. Trent being 10 was just not interested in Santa, or maybe he was just more interested in his little friend that was there. Laci made it very clear that she was NOT sitting in Santa's lap even though I tried to convince her.


I took a picture of this because I thought it was neat to see in our little town of Wetumpka. If you look close you can see a blimp in the middle of the picture. Yeah, a blimp-- here. What?!! It was pretty neat to see. It was fast too. One minute it would be in one place and when you looked back up it was completely somewhere else. It was a fun night for our family!

Monday, November 30, 2009

A Happy Thanksgiving

Trent, Kyle,Ivy and Laci


I hope everyone had a happy Thanksgiving. We certainly did. We had my parents,sister, bro in-law, nephew, nephew's girl friend, and my nanny over to celebrate with us. We had a good time together and ate too much yummy food. Afterwards, we headed down to a windy Gold Star Park to take some pics of the kids. Here are some of the pictures I captured that day. I am so thankful for all of my family.


Ivy


A gorgeous view of the Bibb Graves Bridge from Gold Star Park.

Tuesday, November 24, 2009

Pecan Tassies


Just wanted to share a recipe today that I have been making for years, Pecan Tassies. They are oh so good! You surely can't eat just one! These are great for a party finger food or maybe as alternative to a whole pecan pie. On second thought, na, just make both. The big pecan pie is just too good, but pecan tassies would be a great addition to your Thanksgiving desserts. These little babies have always been a hit with my family and any party I take them too. It's gotta be that yummy crust and sweet pecan filling. So good!


Pecan Tassies
Dough for crust:
1 stick butter, softened
1 3 oz. pkg. cream cheese, softened
1 c. flour

Filling:
3/4 c. brown sugar
1 egg
2 Tbsp. melted butter
1 tsp. vanilla
1/3 c. chopped pecans

First, mix together dough ingredients with an electric mixer. Refrigerate dough in covered bowl until firm. About 3 hrs.
Preheat oven to 350.After dough has been refrigerated and firm, mix together filling ingredients.Set aside. Pinch off pieces of dough and roll into marble size balls.Put dough into mini-muffin pan. Use a floured tart shaper(from Pampered Chef) to press dough in cups or you can press dough up sides of cups with your fingers. Spoon about a tsp. of filling into each crust. Bake at 350 for 15-20 minutes or until crust is golden and filling is set. Makes 2 dozen.

Tuesday, November 17, 2009

Gratitude Tree


Last night during our family night we made this cute little gratitude tree. It's a great activity for this time of year. We talked about how when are our attitudes might not be the best, it helps to remember our blessings and the things we are thankful for. It can help turn our sour attitudes into gratitude.

For our tree, I used one of my Dollar Tree vases and the kids and I filled it with river rocks I had stashed away. I cut out leaves in fall colored card stock and everyone wrote one thing they were thankful for and then we hung our leaves on small tree branches we stuck into the vase. The leaves on our gratitude tree said things like: my family, books, our home, my whole family and computers. We had fun making our tree and counting our blessings. We plan on adding more leaves next week.

Monday, November 16, 2009

A Funny For Your Monday

I just thought I'd share a funny thing that happened a couple weeks ago with my little Ivy. Everyone needs a laugh to get their Monday going, right! So, Ivy and I were on the way back from Montgomery, but before we left I had given her a pack of Smarties candy to hold in her hand and eat. It was a few days after Halloween, so I had put a pack of those in my purse and told her she could have them on the way home. No worries, right.-- Wrong! We are driving down the road and I hear, "Look mom. Look." Only the way Ivy can say it. So I peek around for a second to look and what do I see.Well, I see a Smartie pushed up each nostril. Yep. That's right. A blue one and a pink one. I had to laugh a little on the inside. She's just sitting there so proud of herself showing me what she had done. I think she might push them further up her nose, so I pulled over to get them out much to her dislike. (This part is kinda gross) When I go to get them out they start to dissolve because they are wet from her nose, but I did manage to get them out and take the other 4 that she still had. Didn't want to risk that one again. It was funny, yet a little scary. This was a new for me. None of my other kids had ever stuck things up their nose. Leave it to little miss Ivy. She's a spunky one. As for the Smarties, their will be no more eating them in the car. Just in case you kow.

Thursday, November 12, 2009

Accessories Jar


The past couple days I have been sharing the head bands and flower clips I made for a baby gift. Well, I needed something to contain it all so I made an accessories jar.Nope. Not my idea. I found it here and totally copied it because I thought it was just too cute. I changed mine up a bit from the original pic I found. I wrapped a cream colored ribbon around the center and added a large scalloped, plum colored, monogrammed circle to the front.


I had to add a little bling with the purple jewel for the "O" in accessories. Doesn't it just look more girly that way?!

The jar contains 4 flower clips, 4 head bands and a hair bow/clip hanger. A cute and different gift for mom and baby.


Tuesday, November 10, 2009

Sew Easy Nylon Headbands


Want to turn these $.33 nylon knee highs into a cute head band? You can and it's "sew" easy! These stretchy head bands are great for the flower clips I showed you yesterday. They will also be part of the baby gift I'm giving a friend. They are priced right, too. You can make four headbands for $.66(2 per package) and your time to sew them. I made two of them in ten minutes.

I found a great tutorial for these on the web. You can find it here. She explains it well and shows each step. I did just what she said to and seriously, ten minutes and done!


I made a black and a cream. The color choices are limited with the little $.33 nylons. Basically you have black, cream, dark blue and that tan color. I think they are just so cute and useful. I would have shown them modeled on my daughter's head(she's 2), but she will NOT wear a headband. We're up to about 30 minutes of leaving a flower clip or hairbow in, but no head bands.

I can't wait to make more of these cuties with my daughter, Laci. She wants to do her own clips to wear. Crafty little girl! Teach 'em when their young,right :)


Monday, November 9, 2009

Flower Clips In Full Bloom


The flower clips are bloomin' at my house. I've been making some of these cute hair clips for a baby gift and thought I'd share how I make them. All the credit goes to Tammy. Thanks for teaching me how to make these! She's right. Once you start making them, they become addictive. I could have kept on making these babies, but I had to sleep!


First, you need to gather all your supplies. You will need some artificial flowers of your choice or scrapbooking flowers. I like gerbera daisies, daisies and here I also used an orchid. You also need a glue gun, alligator clips, wire cutters, coordinating ribbon and brads or embellishments for the center of the flower.


Second, use the wire cutters to clip off the flowers. Pull out the center of the flower and each layer of the flower should come apart easily. Arrange the petals how you would like them to look. It's usually best to start with the large petals and layer on smaller ones. Just like a regular flower. Be creative. You can use coordinating colors of petals. Do what you think looks good.


Changed flowers on ya. I forgot to take a pic of the orchid one coming together. So, for this one I wanted to leave it just how it would normally look. Once your petals are layered you need something to hold them together. I find it easiest to use a brad fastened on the bottom to hold them together. It could be a decorative brad or if you want to use a jewel or the flower's normal center(like I did here), just use a small brad and hot glue the embellishment over the top of the brad.


Next, I wrap the alligator clip with ribbon. This part can be a bit tricky. I used a grosgrain and while holding the clip open put hot glue on the bottom inside of the clip and put my ribbon over that. I then hot glued the bottom of the clip(the side that will attach to the flower)and wrapped the ribbon over that. Pull the ribbon up over the part of the clip that you pinch to open it(not sure what that part is called).Then put a dab of hot glue on the top of the clip and wrap the ribbon over that spot. Just be careful with this whole ribbon/clip process not to glue your clip shut. Last, hot glue your clip,ribbon side down, to the back of the flower.


You're done! Clip your flower onto a head band, directly in your hair or dress up a shirt. Great for baby girls and big girls alike. Their are lots of possibilities. Come back tomorrow and see the nylon head bands that I made. They are so easy!
Related Posts Plugin for WordPress, Blogger...